How I made a claymation-inspired product launch video that doesn't look like AI slop
July 7, 2026
Earlier this month we launched Toyo's first product: an AI assistant that lives in your messages.
I wanted to announce the launch with a fun launch video. It had been a while since I produced something like this and I was excited to try and see how well I could leverage the latest AI video models to create something that felt more fun, unique and considered than the majority of AI video slop filling my social media feeds.
Some of that content is technically impressive, and I had seen a few examples of people who clearly really cared about the details sharing genuinely impressive AI-created videos, but the majority of what's I've seen recently accompanying startup product launches felt like someone hacked it together without much consideration or taste.
Other than explaining what Toyo is, we set one constraint for our launch video: it had to feel like we cared about making it.
Here's the result:
Based on the feedback we got, and the engagement analytics we have access to, I think we succeeded. A lot of people have since asked me how I made it, so I wanted to write about the process.
Why stop motion?
Back in 2013, at our previous company MediaCore, my co-founders and I made a real stop-motion film to introduce the 'flipped classroom', what was at the time a new video-centric learning model that was becoming popular in schools and universities.
I worked very closely on the video with our friend Joseph Brett, an incredibly talented animator. Stop motion is handcrafted, physical, and charming, imperfect in ways that read as human.
The MediaCore flipped classroom film, 2013. Paper stop motion, and the piece that got me hooked on the form.
We had a blast making the video, and people loved it. We were lucky enough to be close enough with Joe to work out a way to make it happen, but typically early-stage companies at the time were lacking the resources to bring something like this to life just for a promo video.
We thought about what types of video could be fun to honour using AI, as well as what kinds of video we hadn't yet seen get popular. When we started this project, we hadn't seen any stop-motion or claymation style AI videos pop up in our feeds yet. I got to work.
Story before pixels
I worked in Claude Code (with a bit of Codex) the way you'd work in a writers' room: exploring concepts, discarding most of them, pressure-testing the survivors. We landed on three characters, each based on one of our early Toyo users, compressing their typical days on screen.
The shared pain that starts their day is some kind of feeling of overlwhelm from notifications and asks on their timeTheir mornings start with the same villain, a wall of notifications, and the film follows how an assistant living in their messages changes the shape of the day. Nearly every beat came from something an early user told us.
The characters got names, personalities, jobs, and environments before they got faces: a contractor whose office is his truck, an operations lead whose day ends at the gym. Each needed a world vibrant enough to sustain a claymation set. When the story locked, we froze it, and everything downstream depended on that discipline.
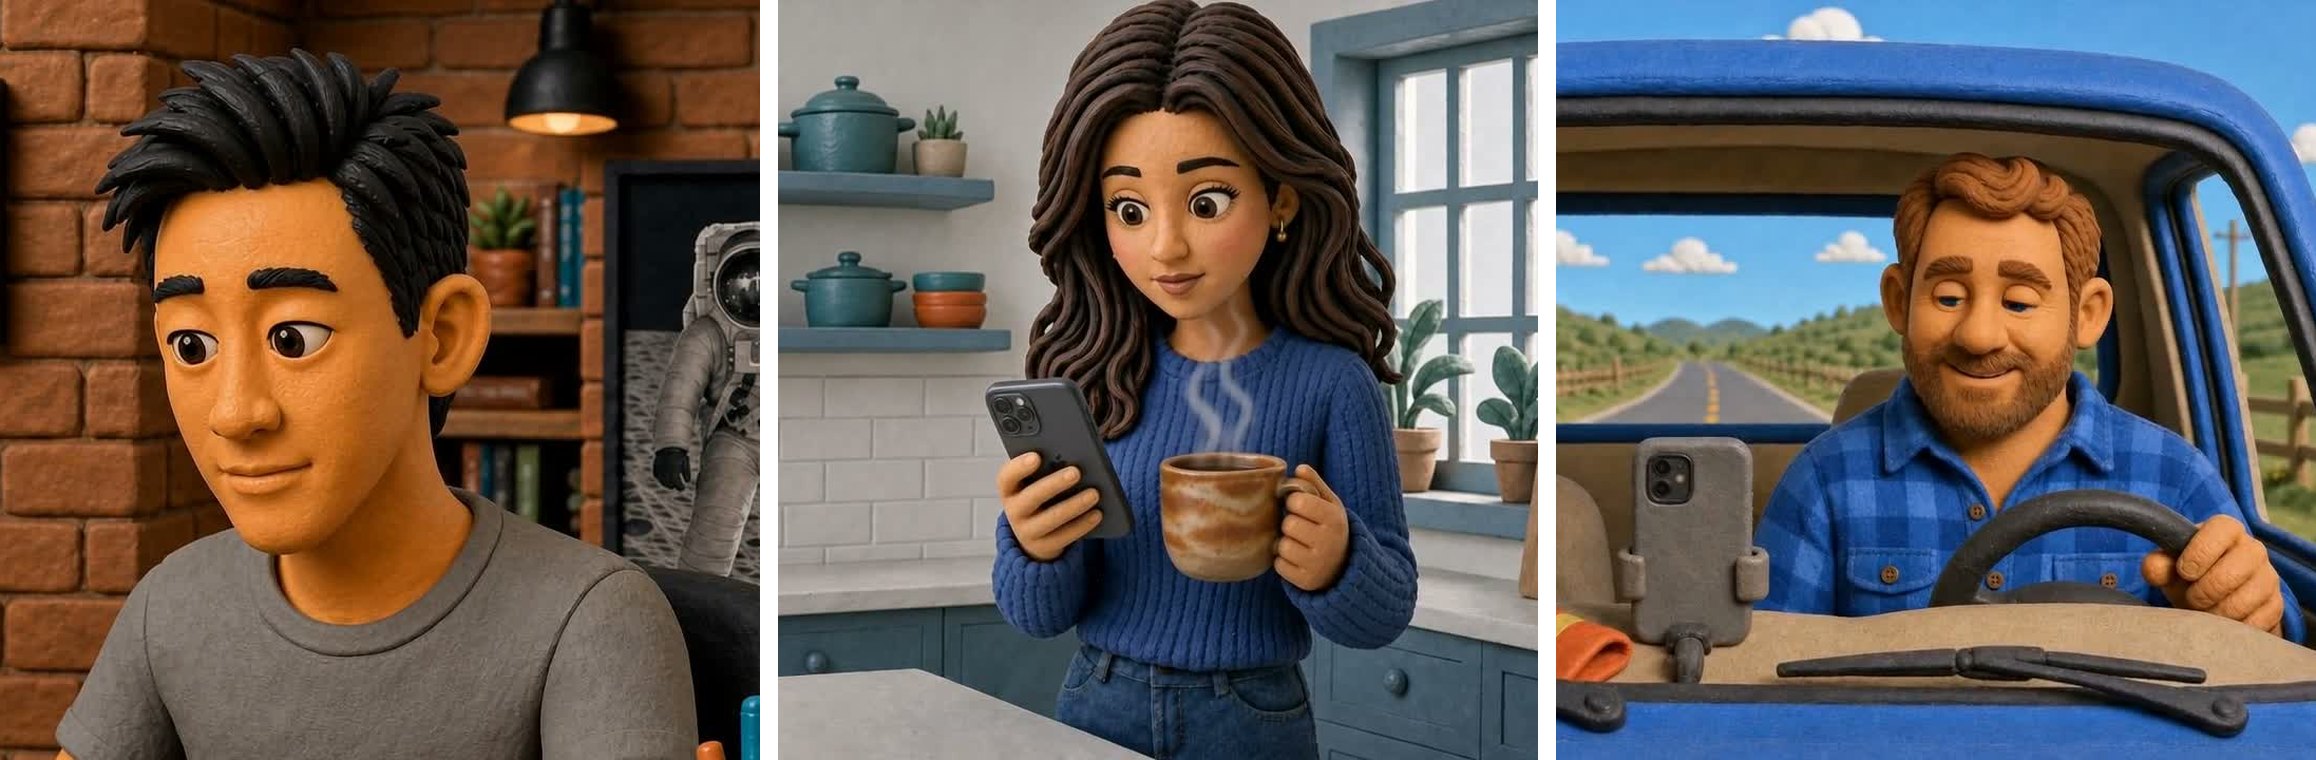
The three leads in their worlds, each built from a type of early Toyo user: a creative, an operations lead, and a contractor.
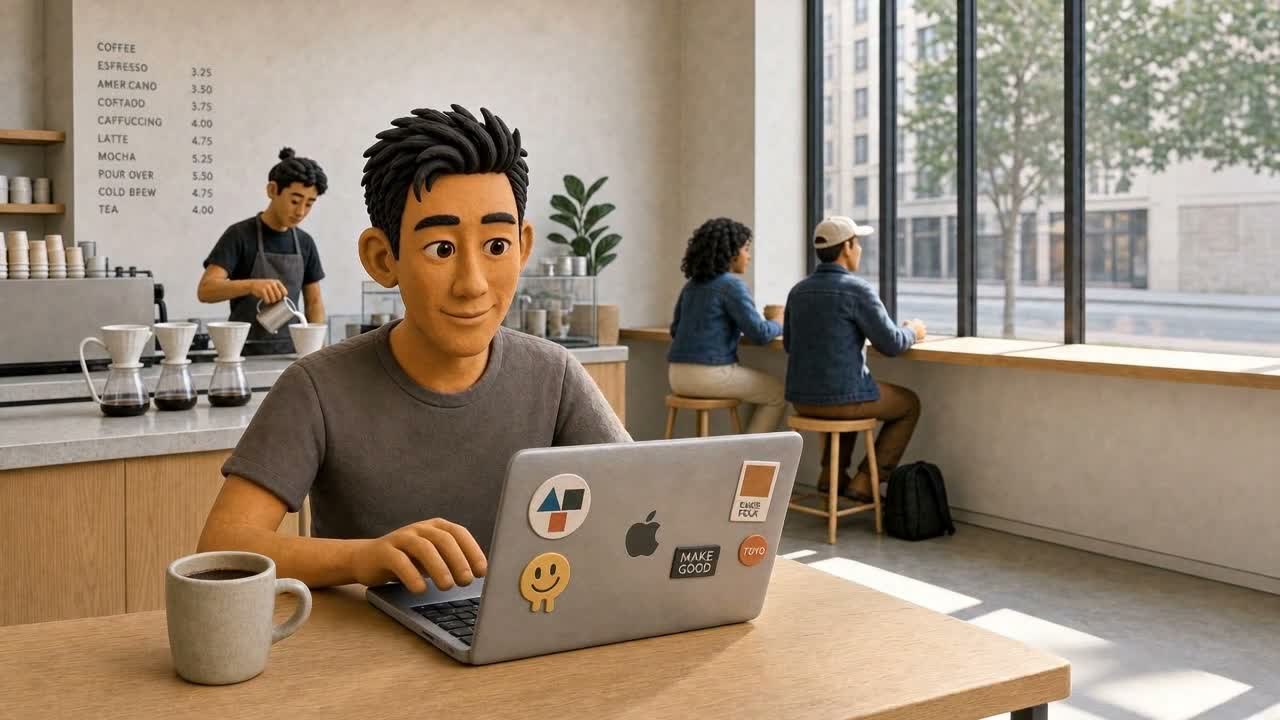
One of the sets: the coffee shop, dressed and lit to hold up as its own shot.
Showing Messages without showing screenshots
Toyo lives inside Messages. People needed to recognize the Apple Messages interface immediately, because that recognition is the product's whole pitch: no new app. But a film that keeps cutting to screen recordings is a film about a phone.
So we pulled the interface into the characters' physical world. Message bubbles and notification cards became clay objects, stacking up on a desk, piling onto a mounted phone until they bury a family photo on the lock screen.
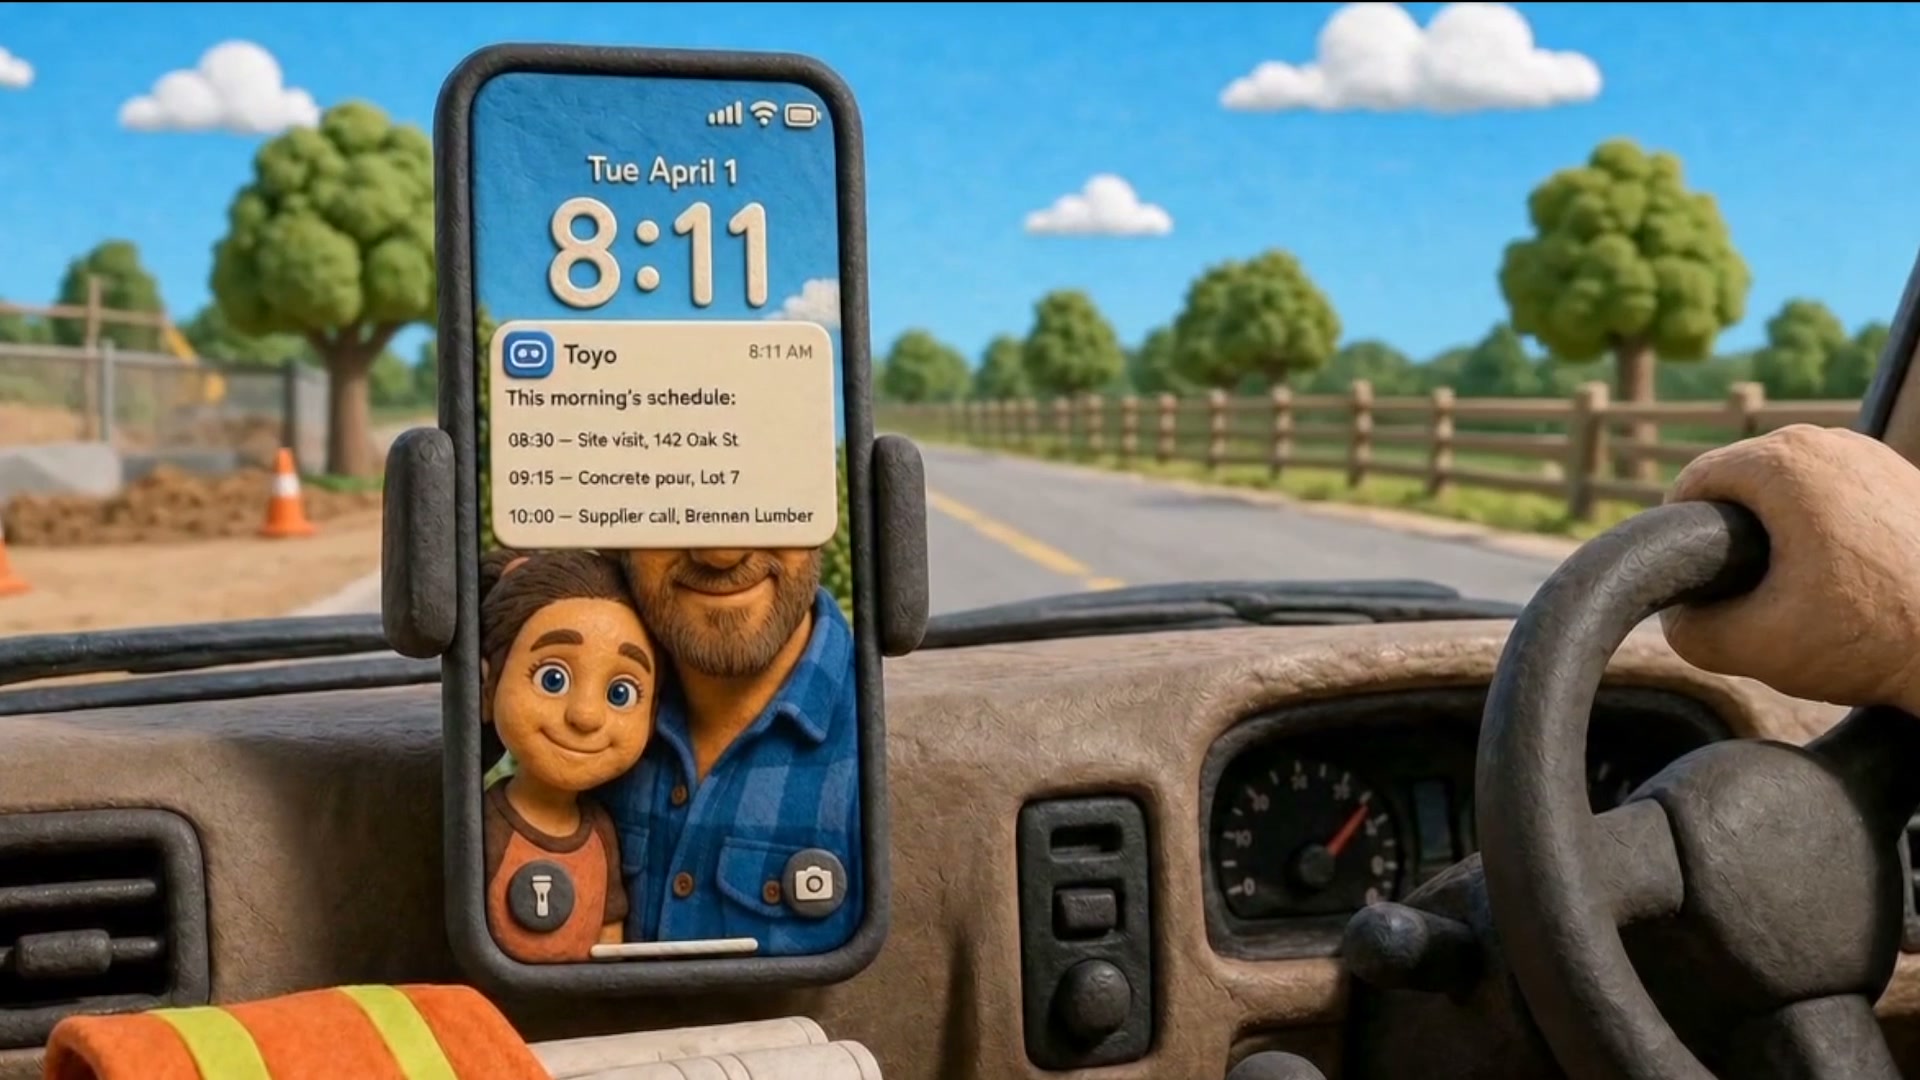
The technical lesson here surprised me. My instinct from years of motion work was to composite: render the scene, then overlay UI in post. Every compositing attempt looked wrong, like stickers floating on footage. What worked was asking the image model to generate the notifications inside the scene, as three-dimensional clay objects that cast shadows and sit in the light of the room. It became a project rule: regenerate, don't composite.
The storyboard became the film
When I studied film, storyboards were disposable. You sketched them, maybe cut them into a rough animatic, then you shot the real thing and the sketches went in a drawer. Pre-production, production, and post were separate stages, and you moved through them once. On this project the walls between them never went up. I kept one timeline alive from the first day to the last, and it never stopped being the film.
It started as rough sketches, deliberately ugly so nobody (including me) would fall in love with visuals before the story earned it. The sketches became claymation stills, and the stills got timing. I used Suno to explore music directions until one track caught the mood, then auditioned voices in ElevenLabs v3 until one fit the piece's personality. By the time we animated a single frame, the video already existed as a watchable thing with pacing, narration, and a soundtrack. Animation became the last step of a continuous process instead of the risky middle of a linear one.

The laptop shot at three stages: the rough blue-pencil board, the crisp clay keyframe still, and the finished frame on twos.
Characters you can rebuild tomorrow
To explore visuals fast, I built a lightweight internal app on the OpenAI Images API (gpt-image-2 renders the film's stills). Batches of variations instead of one-at-a-time chatting: characters, environments, props, palettes, expressions.
The output that mattered most was the reference sheets, not any single image. Once a character's design settled, we rendered a sheet per character (front, close-up, three-quarter view) and attached it to every future generation featuring that character. Image models will invent a new face every time if you let them. The reference sheet is what turns "a claymation man with a beard" into Marcus, the same Marcus, in shot after shot.
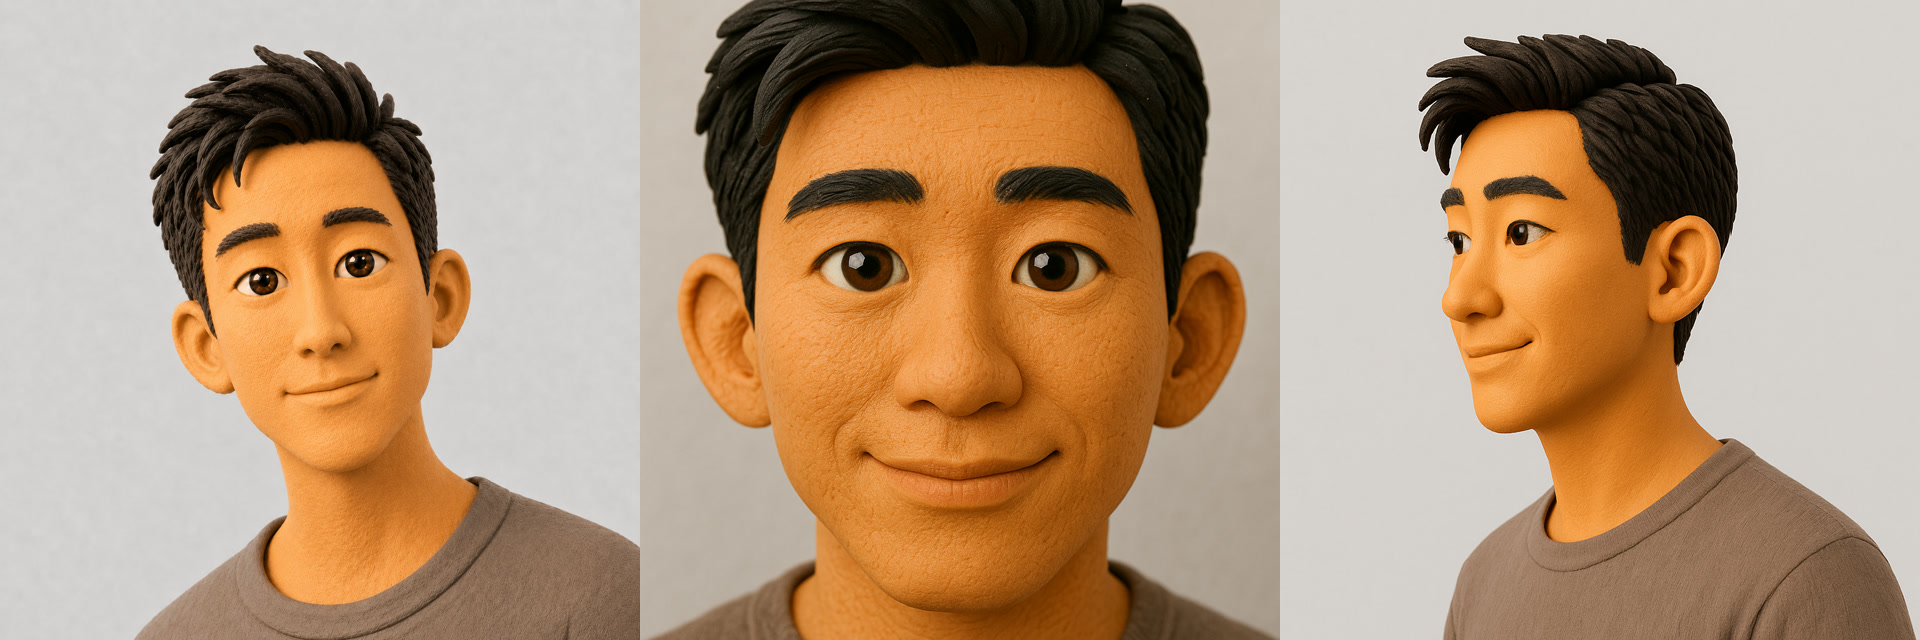
That discipline paid an unexpected dividend after launch. When we needed a vertical cut for social, we had locked and versioned the story, the reference sheets, and the working prompt for every shot, so re-rendering the whole film in 9:16 took days rather than weeks, directed by notes as small as "this phone should start with its screen off."
Finding the right kind of stop motion
For motion, I extended the same code setup to drive video models over an API. I tried Runway early on, and along the way A/B-tested Grok Imagine against gpt-image-2 for still generation. The animator that stuck was ByteDance's Seedance model, driven through Replicate: give it a still keyframe (or two, and it interpolates between them) and it follows direction, including the direction to hold the camera still.
The hard part was taste, not rendering. There are kinds of stop motion. Too jagged and it reads as broken. Too smooth and it stops being stop motion at all, sliding into the exact glossy look we were trying to escape. We needed the middle: an homage that doesn't look cheap.
Two discoveries got us there.
First, the stop-motion cadence doesn't come from the model. Prompting "animate this on twos" does nothing; the video models we used render smooth motion no matter what you ask. The cadence comes from post-production: drop the footage to 12 frames per second, then conform it back to 24 so every frame shows twice. That one ffmpeg step does most of what makes the film read as stop motion.
Second, the models' biggest defect turned out to be the thing we needed. They regenerate every pixel of every frame, so nothing holds perfectly still and every object carries a one-to-two-pixel shimmer. Real clay animation has the same tell (animators call it boil) because hands have touched everything between exposures. Early on I treated the shimmer as an artifact and tried to remove it, which was exactly backwards. Kill it and you get a 3D render; keep it and the film feels handmade. We ended up protecting it.
Left: a raw take straight out of the model, smooth and glossy. Right: the finished shot as it runs in the film, on twos with the boil kept and the grade applied.
Where the work went
Generating images is fast; generating the same image twice is nearly impossible, and that gap is where this project lived. By my rough accounting, 80% of the hours went here.
Consistency has two layers. Static consistency: the contractor's MacBook has stickers on the lid, and they need to be the same stickers in every scene, on the same laptop, held the same way, by hands with the right number of fingers. Then motion consistency on top: lighting, camera behaviour, and object permanence within every animated shot. Every generation is a fresh roll of the dice, so the job becomes stacking the dice: reference sheets attached to every character shot, working prompts frozen the moment they produce an approved take, and a growing file of rules for what the model gets wrong and how to head it off.
The hardest shot in the film is one of the first: a character opens his laptop and a cloud of notifications erupts around it. We generated well over a hundred versions before it felt right. Early versions read as an action movie; softer ones didn't sell the overwhelm. The version in the film exists because we could afford attempt 101, and because we looked at the first hundred.
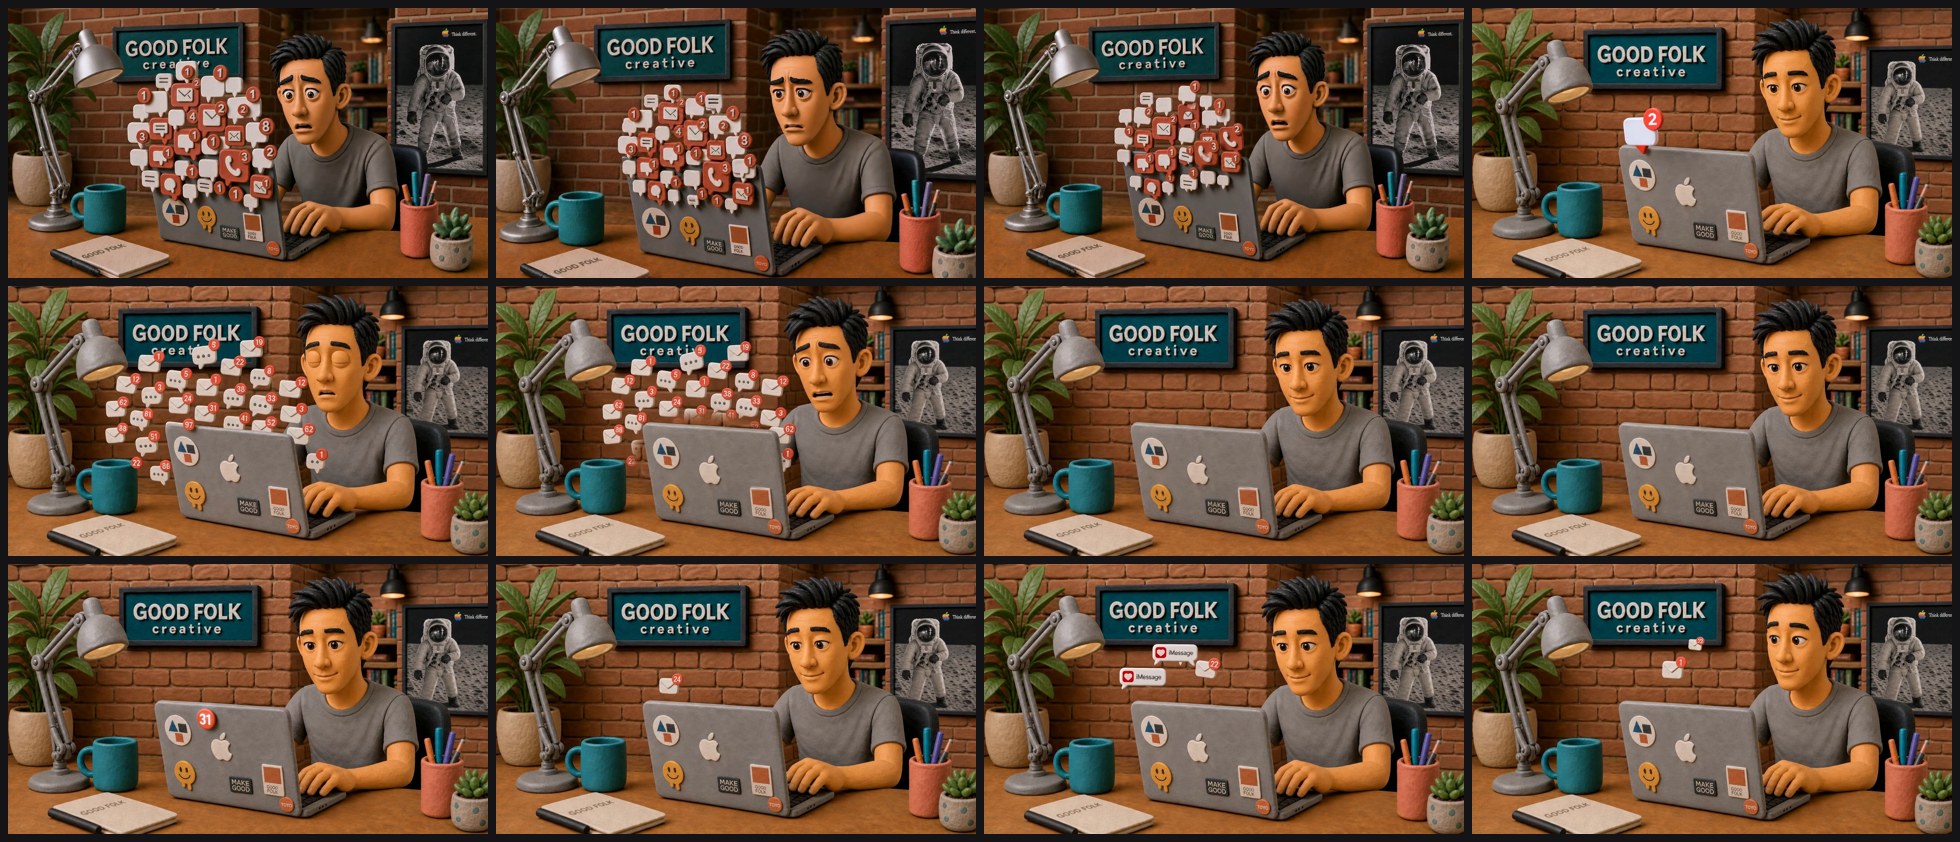
Twelve takes from the laptop scene. The project archive holds 236 video files for this one shot.
By the end, the archive held more than three hundred scripts and seven gigabytes of takes for a 74-second film with 31 shots. This is what "AI made it fast" looks like up close: each attempt is fast, and you need hundreds of them.
Field notes
Beyond the cadence, the boil, and the compositing rule above, the specific lessons for anyone attempting this:
- Never ship a prompt without its negatives. Every video prompt we used carried "NOT smooth, NOT glossy, NOT CGI" verbatim. Remove them and the style drifts back toward default gloss within a shot or two.
- Animate between two keyframes when the shot must travel. For a controlled change (a screen turning on, a lock screen gaining a notification card) generate a start still and an end still and let the model interpolate between them. Make the endpoints identical except for the intended change, or props will morph. For emergent motion with no fixed end state, like that notification swarm, a single keyframe works better.
- Locking the camera takes four things. The model's fixed-camera flag, lock language in the prompt, naming the props that must not move, and an isolation clause: "only Marcus moves." Together they reduce drift rather than eliminate it; we still subtracted residual zoom and slide in post, gently enough that the shimmer survived.
- Generational decay is real. Cap edit chains at two passes; each pass re-bakes the clay texture and darkens the palette. Rebuild from a clean source instead of editing an edit.
- Text is the canary. Diffusion models re-hallucinate letterforms on every frame. Any text that has to stay legible, like screens and logos, gets generated once in a still and held from that still in the finished shot. This is the one place we deliberately broke our own no-compositing rule.
- Review filmstrips, not playback. Six frames laid side by side expose morphing, camera drift, and ghosting that your eye forgives at 24 frames per second. Nearly all of our QA happened on contact sheets.
The old-school ending
Everything finished in Final Cut Pro, and the final stretch would have been familiar to any editor from twenty years ago: cutting, retiming, swapping a take, nudging a transition, watching it again. The hundredth small decision that no one will consciously notice, made anyway. AI compressed production enormously but never touched this part. The last mile of any film is judgment applied at close range.
What I learned
The whole project took a few weeks of evenings, weekends, and a couple of long flights. A team of one, part-time, produced a film that would have been a six-figure studio engagement ten years ago.
The models did less than the hype suggests, though. They handled rendering; every decision that made the film worth watching was human, and there were thousands of them: which take to use, which cadence, which imperfections to protect, when to stop. Generating a hundred shots is now trivial, which means the scarce skill is looking at a hundred shots and knowing which one is right. The tools cut the cost of production without lowering the bar for making something people remember. If anything, the flood of defaults has raised it.
Since launch, a few people have asked about the pipeline behind this video. I'm working on open-sourcing the stack: the lock system for characters and prompts, the render tooling, and the claymation recipe as its first style pack. If you want it when it lands, follow along.